
In the captivating world of music production and home recording, a MIDI controller serves as a bridge between your creative impulses and the digital canvas of your digital audio workstation (DAW). It empowers you to compose, shape, and fine-tune music with precision, taking your artistic endeavors to new heights. However, not everyone has an unlimited budget for their home studio equipment. That’s where budget-friendly MIDI controllers come into play.
In this comprehensive guide, we will explore the realm of budget home studio MIDI controllers. We’ll delve into the significance of these devices, what to look for when choosing one, and how they can enrich your music production journey without causing financial strain. Whether you’re a budding musician or a seasoned producer, you’ll discover that a budget MIDI controller can be your ideal creative companion.

Table of Contents
Introduction
The Anatomy of a MIDI Controller
- Understanding the Building Blocks of a MIDI Controller
Why Opt for a Budget Home Studio MIDI Controller
- The Advantages of Budget-Friendly Equipment
- Dispelling Myths About Budget MIDI Controllers
- Harnessing Creativity on a Budget
Factors to Weigh When Choosing a Budget MIDI Controller
- Key Count and Type
- Control Surfaces and Pads
- Connectivity Options
- Compatibility with Your DAW
- Build Quality and Durability
- Portability and Size
- Extra Features and Customization
Setting Up and Configuring Your Budget MIDI Controller
- Step-by-Step Guide to Connecting and Configuring Your MIDI Controller
- Tackling Common Setup Issues
- Tips for Optimizing Your MIDI Controller for a Seamless Experience
Accessories and Software to Elevate Your Setup
- Must-Have Accessories for Your MIDI Controller
- Free and Affordable Plugins and DAWs to Enhance Your Music Production
User Insights and Experiences
- Real-Life Stories from Musicians and Producers Using Budget MIDI Controllers
- Lessons Learned and Recommendations
Common Mistakes to Avoid
- Pitfalls to Watch Out for When Choosing a Budget MIDI Controller
- Guidance for Making Informed Decisions
Conclusion
- Summing Up the Benefits of Budget Home Studio MIDI Controllers
- Encouraging Aspiring Musicians and Producers to Embrace Their Creative Journey on a Budget
Appendix
- Glossary of MIDI Terminology
- Additional Resources for Further Learning and Support
Introduction
Music is a universal language, and the desire to create it is shared by many. Whether you’re a seasoned musician or a novice producer, a MIDI controller is a powerful tool that opens up a world of possibilities for music creation. It acts as a conduit, allowing you to express your ideas in the digital realm of your chosen DAW. The good news is that you don’t need to empty your wallet to access this world. In this guide, we’ll navigate the landscape of budget home studio MIDI controllers, helping you unleash your musical creativity without financial constraints.
The Anatomy of a MIDI Controller
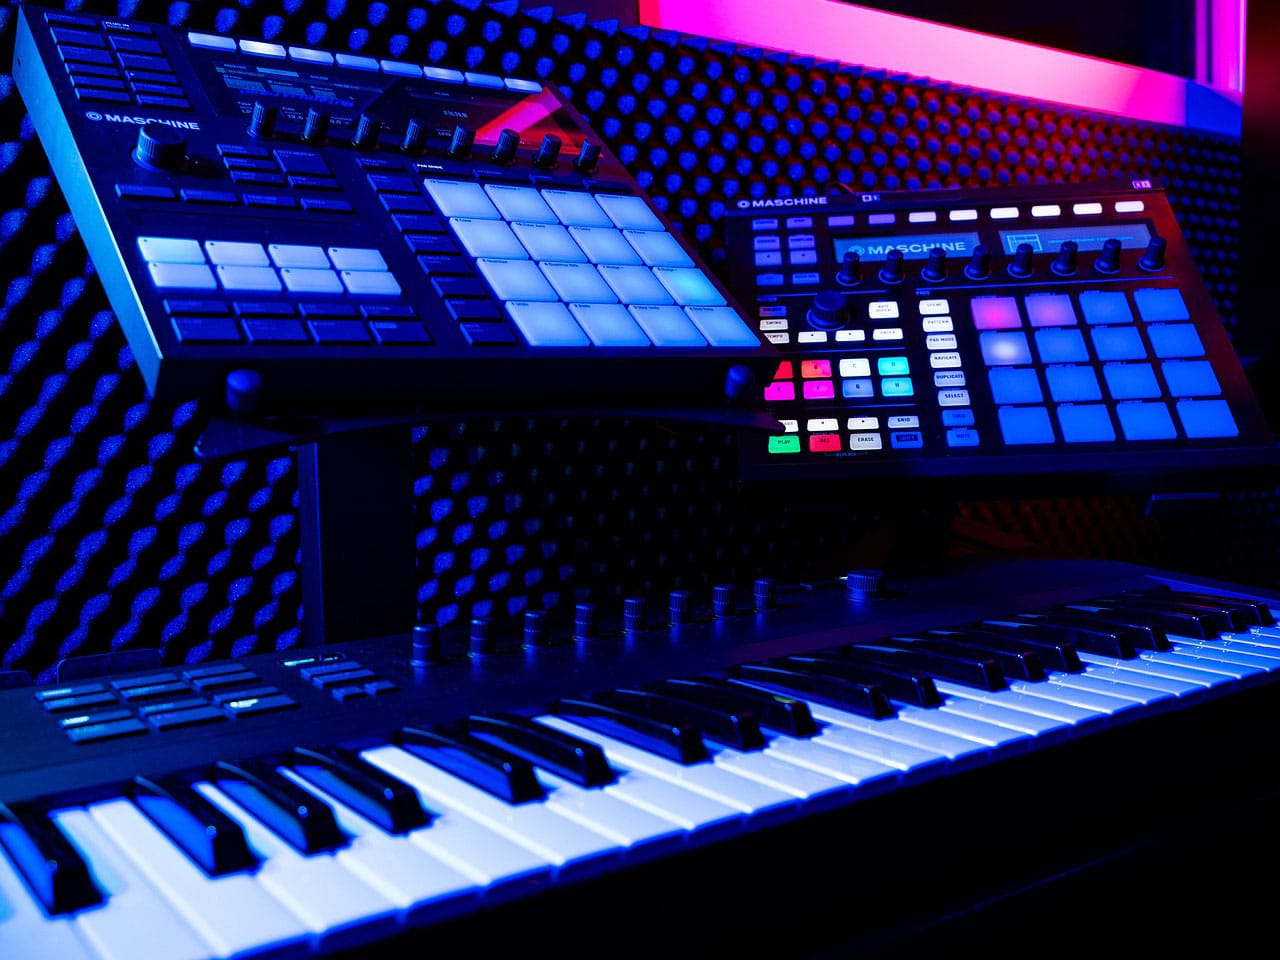
To appreciate the significance of budget MIDI controllers, it’s essential to understand their fundamental components and functions. MIDI controllers come in various forms, each designed for specific creative tasks. Whether it’s a keyboard, pad controller, or knob-laden surface, these devices share common traits that make them indispensable tools for music production.
Understanding the anatomy of a MIDI controller is essential for musicians and producers looking to harness the full potential of these devices. In this section, we’ll explore the various components and features that make up a typical MIDI controller:
1. Keys or Pads:
- Keys: MIDI controllers often feature a keyboard with keys that can range from a few octaves to full-sized piano keys. The keys serve as the primary input for playing melodies and harmonies. Some controllers include semi-weighted or weighted keys for a more authentic piano feel.
- Pads: In addition to keys, many controllers have trigger pads. These are typically used for drum programming, sample triggering, and launching clips in DAWs. Pads are velocity-sensitive, allowing for expressive and dynamic playing.
2. Knobs and Encoders:
- MIDI controllers come equipped with knobs and rotary encoders. These controls are used to adjust parameters like volume, panning, and filter cutoff. They can be mapped to various functions within a DAW or software instruments for real-time manipulation.
3. Faders:
- Faders, or sliders, provide tactile control over volume, expression, and other continuous parameters. These are particularly useful for mixing tasks and automation. Some controllers offer motorized faders that automatically adjust to the current settings in your DAW.
4. Modulation and Pitch Bend Wheels:
- Modulation wheels and pitch bend wheels allow for real-time control over modulation and pitch variations. The modulation wheel is often used for vibrato and other expressive effects, while the pitch bend wheel simulates the bending of strings on a guitar or other pitch variations.
5. Buttons and Transport Controls:
- Many MIDI controllers feature dedicated buttons for functions such as play, stop, record, and loop. These transport controls make it easy to navigate your DAW and trigger recording or playback actions.
6. Display Screen:
- Some MIDI controllers come equipped with an integrated display screen. This screen provides feedback on parameters, settings, and menu navigation. It’s especially useful for controllers with complex mapping options.
7. Octave and Transpose Buttons:
- These buttons allow you to shift the pitch of the keys or pads up or down in octaves, extending the range of playable notes. They’re handy for accessing a broader range of sounds without changing the overall layout.
8. Connectivity Ports:
MIDI controllers typically have several connectivity options, including:
- MIDI In and Out: These ports allow you to connect your controller to other MIDI devices like synthesizers or sound modules.
- USB Port: USB connectivity enables direct connection to a computer or mobile device, making it the most common method for modern controllers.
- Expression Pedal Inputs: Some controllers have inputs for expression pedals, which can be used for continuous control over various parameters.
- Sustain Pedal Input: This input connects to a sustain pedal, allowing for sustained notes, similar to a piano’s damper pedal.
9. Power Options:
MIDI controllers can be powered through various means:
- USB Bus Power: Many controllers are bus-powered through the USB connection to a computer. This eliminates the need for an external power source.
- AC Adapter: Some larger controllers may require an AC adapter for power.
- Battery Power: Portable MIDI controllers often run on batteries, offering mobility and flexibility for on-the-go use.
10. Customization Options:
- Some MIDI controllers allow users to customize the mapping and behavior of controls. This feature lets you adapt the controller to your specific needs and the requirements of your DAW or software instruments.
Understanding the anatomy of a MIDI controller is the first step in effectively using these devices in your music production workflow. The various components and features offer versatile and expressive control over virtual instruments and DAWs, making them essential tools for musicians and producers in the digital age. Whether you’re playing live, recording in the studio, or producing electronic music, a MIDI controller’s design and capabilities can significantly impact your creative process.
Why Opt for a Budget Home Studio MIDI Controller
The allure of budget-friendly gear goes beyond cost savings. It’s about accessibility and the realization that remarkable music can be created without investing in expensive equipment. In this section, we’ll explore the advantages of budget MIDI controllers, dispel myths about their limitations, and encourage you to embrace your creative potential without financial constraints.
Opting for a budget home studio MIDI controller can be a wise choice for many musicians and producers, especially those who are just starting or have budget constraints. Here, we’ll explore the various reasons why selecting a budget MIDI controller is a practical and advantageous decision:
1. Affordability
- Cost-Effective Entry: Budget MIDI controllers are cost-effective, making them accessible to musicians on a tight budget. They provide an affordable entry point for those who want to explore MIDI technology without a significant financial commitment.
- Ideal for Beginners: For beginners or hobbyists, starting with a budget-friendly MIDI controller is a prudent approach. It allows you to learn the basics of MIDI technology, music production, and composition without a substantial upfront investment.
2. Functionality and Versatility
- Core Functionality: Budget MIDI controllers offer essential features that are sufficient for a wide range of music production tasks. You can create melodies, trigger samples, control virtual instruments, and perform basic recording and sequencing.
- Compatibility: Most budget controllers are designed to work seamlessly with popular digital audio workstations (DAWs). They offer the necessary MIDI connectivity and are often USB class-compliant, ensuring compatibility with various computer setups.
3. Learning and Skill Development:
- Ideal for Learning MIDI: If you’re new to MIDI technology, a budget MIDI controller provides a low-risk environment to learn and experiment. You can grasp the fundamentals of MIDI, note sequencing, and controller mapping without a substantial investment.
- Skill Building: Using a budget controller allows you to develop essential music production skills, such as MIDI programming, arranging, and sound design. As your skills grow, you can consider upgrading to more advanced equipment.
4. Low Maintenance Costs:
- Cost-Effective Maintenance: In the event of a malfunction or wear and tear, budget MIDI controllers are often more affordable to repair or replace. This ensures that your studio setup remains cost-effective in the long run.
- Economical Upgrades: When you decide to upgrade your equipment, budget controllers can serve as backups or supplementary devices, offering continued value.
Therefore opting for a budget home studio MIDI controller is a practical choice for musicians and producers at various stages of their creative journey. These controllers offer affordability, core functionality, convenience, and room for skill development. They can be integral components of your music production setup, whether you’re just starting out, seeking to diversify your equipment, or aiming to experiment with creativity and innovation. Embracing the budget option opens doors to musical exploration and ensures that you can make music without a hefty financial investment.
Factors to Weigh When Choosing a Budget MIDI Controller
Selecting the right budget MIDI controller for your home studio involves considering several factors. Key count, key type, control surfaces, and connectivity options are just a few of the aspects to ponder. Compatibility with your DAW, build quality, and extra features also play a significant role in your decision-making process. We’ll break down each of these factors to help you make an informed choice.
Let’s dive deeper into the factors you should consider when choosing a budget MIDI controller for your home studio. Selecting the right MIDI controller is a crucial decision, and these factors will help you make an informed choice:
1. Key Count and Type:
- Key Count: The number of keys on a MIDI controller can vary significantly. Smaller controllers often have 25 or 32 keys, while larger ones can have 49, 61, 88, or more. Consider the range of music you intend to play and the space available in your studio. If you’re primarily a pianist, you might prefer a controller with more keys.
- Key Type: MIDI controllers come with different types of keys, including synth-action and weighted keys. Synth-action keys are springy and responsive, making them suitable for a wide range of music styles. Weighted keys replicate the feel of a traditional piano and are preferred by pianists for expressive playing.
2. Control Surfaces and Pads:
- Pads: Many MIDI controllers feature pads that can be used for triggering drum sounds, samples, or controlling various functions in your DAW. Check the number and sensitivity of these pads to ensure they meet your specific needs.
- Knobs and Faders: Some controllers come with assignable knobs and faders for hands-on control of parameters like volume, panning, and effects. Consider the number and quality of these controls, as they can greatly enhance your workflow.
3. Connectivity Options:
- MIDI Ports: It’s essential to check if the controller has traditional MIDI ports (MIDI In and MIDI Out). These ports allow you to connect to external hardware synthesizers and other MIDI devices.
- USB Connectivity: Most modern MIDI controllers connect via USB, making them compatible with a wide range of computers and devices. Ensure the controller is USB class-compliant for easy plug-and-play setup.
- Expression Pedal Input: If you plan to use expression pedals for dynamic control, check if the controller has an input for these devices.
- Sustain Pedal Input: A sustain pedal is a common accessory for keyboardists. Verify that the controller supports a sustain pedal input if you require one.
4. Compatibility with Your DAW:
- It’s crucial to ensure that the MIDI controller you choose is compatible with your preferred digital audio workstation (DAW). Most controllers are designed to work with major DAWs like Ableton Live, Logic Pro, Pro Tools, and more. Look for the “HUI” or “Mackie Control” compatibility if you use specific DAWs.
- Check if the controller comes with software or DAW templates that streamline the integration process.
5. Build Quality and Durability:
- Even with a limited budget, prioritize a MIDI controller with good build quality. It should be robust and durable, as it will likely see frequent use in your studio. Read user reviews and consider controllers made by reputable manufacturers known for their build quality.
- Pay attention to the materials used in the construction, the quality of the keys, and the overall sturdiness of the device.
6. Portability and Size:
- If you plan to use your MIDI controller for live performances or need to move it frequently, consider its size and weight. Compact and lightweight controllers are easier to transport.
- On the other hand, if your studio setup is fixed, a larger controller with more keys and controls may be preferable.
7. Extra Features and Customization:
- Some MIDI controllers offer unique features like aftertouch, LED displays, and extensive programmability. Consider what additional features align with your specific music production needs.
- Look for customization options, as the ability to assign different functions to buttons and knobs can greatly enhance your workflow and creative expression.
By carefully evaluating these factors, you can select a budget MIDI controller that best matches your musical style, studio setup, and creative goals. Remember that the perfect MIDI controller for you is the one that complements your music production needs while fitting within your budget constraints.
Setting Up and Configuring Your Budget MIDI Controller
Once you’ve chosen your budget MIDI controller, the next step is setting it up. This section provides a step-by-step guide to connect and configure your MIDI controller with your chosen DAW. We’ll also address common setup issues and offer tips to optimize your setup for a seamless music production experience.
Setting up and configuring your budget MIDI controller is a crucial step to ensure it seamlessly integrates with your digital audio workstation (DAW) and becomes an efficient tool in your music production workflow. In this section, we’ll provide an in-depth guide on how to set up and configure your MIDI controller for a smooth and productive experience:
1. Connect the MIDI Controller:
- First, connect your MIDI controller to your computer or recording device. Most budget-friendly MIDI controllers use USB connectivity, so plug the USB cable into an available USB port on your computer.
- If your controller also has traditional MIDI ports (MIDI In and MIDI Out), you can connect them to other MIDI equipment, such as external synthesizers or sound modules. Use standard MIDI cables for this purpose.
2. Install Required Drivers:
- In many cases, budget MIDI controllers are class-compliant, meaning they don’t require additional drivers for basic functionality. However, it’s a good practice to check the manufacturer’s website or the included user manual to see if there are any specific drivers or software updates available for your controller. Install any necessary drivers or firmware updates to ensure compatibility with your operating system.
3. Choose Your DAW:
- Open your preferred digital audio workstation (DAW). Ensure that your DAW is compatible with your MIDI controller. Most major DAWs have built-in support for a wide range of MIDI controllers, so you should be able to select your controller from a list of available devices.
- If your controller is not automatically recognized by your DAW, you might need to consult your DAW’s documentation or support resources for guidance on manually configuring the device.
4. Assign MIDI Inputs and Outputs:
- In your DAW, access the preferences or settings menu to assign the MIDI inputs and outputs for your controller. This step ensures that your DAW can send and receive MIDI data from the controller.
- Confirm that your MIDI controller is selected as the input device for MIDI data. This is essential for recording MIDI notes, control changes, and other parameters in your DAW.
5. Mapping Controls:
- Many budget MIDI controllers come with pre-mapped configurations for popular DAWs. However, if your controller offers customization options, take advantage of this feature. You can often map the knobs, faders, and buttons to control various parameters in your DAW, such as volume, pan, effects, and virtual instruments.
- Refer to the user manual or documentation provided with your MIDI controller for specific instructions on how to map and customize controls.
6. Testing and Calibration:
- After configuring your MIDI controller, it’s a good idea to perform a few test runs. Play notes on the controller’s keyboard and ensure they are accurately recorded in your DAW. Test the pads, knobs, and faders to check their responsiveness and functionality.
- Some MIDI controllers offer calibration options to fine-tune the sensitivity of controls. Calibrate your controller if needed to achieve optimal performance.
7. DAW-Specific Integration:
- If your DAW supports specific control surfaces or MIDI controller templates (e.g., Mackie Control or HUI for control surfaces), consider enabling these features to enhance integration. This can provide hands-on control over various DAW functions, such as mixing, transport controls, and automation.
8. Saving Your Configuration:
- Once you’ve configured your MIDI controller to your liking, save your setup or configuration as a preset or profile. This ensures that you can easily recall your preferred settings in the future.
- Additionally, create backup copies of your configuration files or profiles to safeguard against accidental loss or system changes.
9. Troubleshooting:
- If you encounter any issues during the setup process, consult the user manual for your MIDI controller and your DAW’s documentation. Additionally, explore online forums and support communities, where you may find solutions to common problems and specific issues related to your equipment.
By following these steps and taking the time to configure your budget MIDI controller properly, you’ll be able to harness its full potential in your music production projects. The effort put into setup and configuration ensures that your MIDI controller becomes a seamless extension of your creativity, allowing you to focus on making music rather than technical issues.
Accessories and Software to Elevate Your Setup
While a budget MIDI controller is the centerpiece of your home studio, several accessories and software options can enhance your setup without straining your budget. From sustain pedals to versatile plugins, we’ll explore a range of options to elevate your music production capabilities.
Enhancing your home studio setup with the right accessories and software can significantly elevate your music production capabilities, even when you’re working with a budget MIDI controller. Let’s delve into the various accessories and software options that can complement your setup:
Accessories to Elevate Your Setup:
Sustain Pedal: A sustain pedal is a simple yet powerful accessory that can add expressiveness to your MIDI controller playing. It allows you to sustain notes, creating rich, legato passages and enhancing the realism of your virtual instruments.
Keyboard Stand: If you have a keyboard-style MIDI controller, a sturdy keyboard stand is essential for ergonomic and comfortable playing. It can adjust to various heights, ensuring you find the right position for your playing style.
Protective Case or Gig Bag: If you plan to take your MIDI controller on the go, a protective case or gig bag is a valuable investment. It safeguards your equipment during transport and storage, preventing damage from bumps and scratches.
Audio Interface: An audio interface is a crucial accessory if you intend to record vocals, live instruments, or other external audio sources. It connects to your computer, providing high-quality audio inputs and outputs for better sound quality.
Headphones or Studio Monitors: Good-quality headphones or studio monitors are essential for monitoring your music. They help you hear every detail of your mixes and are especially important for accurate sound representation during production.
MIDI Cables: MIDI cables are required to connect your MIDI controller to other MIDI equipment, such as synthesizers or sound modules. Ensure you have the necessary cable lengths for your studio configuration.
USB Hub: If you have multiple USB-powered devices in your setup, a USB hub can be a lifesaver. It expands the number of USB ports available on your computer, reducing cable clutter and simplifying connectivity.
Enhancing your budget home studio setup with these accessories and software options enables you to expand your creative possibilities and achieve professional-sounding recordings. These additions can make your music production more efficient, versatile, and enjoyable, while also accommodating your budgetary constraints.
User Insights and Experiences
User insights and experiences play a vital role in your journey to choose and make the most of your budget MIDI controller. Learning from the real-world experiences of other musicians and producers can provide valuable guidance, tips, and inspiration. In this section, we’ll delve into the importance of user insights and how they can benefit you:
The Value of Real-World Experiences:
Practical Insights: Musicians and producers who have used budget MIDI controllers in their work can share practical insights into how these controllers perform in real-world scenarios. They can describe their experiences with specific models, including their strengths and any limitations they encountered.
Challenges and Solutions: User experiences often highlight challenges and how they were overcome. Learning from the hurdles others have faced can help you navigate similar issues more efficiently. This includes setting up the controller, configuring it with your DAW, and using it effectively in music production.
Recommendations: Users can provide valuable recommendations based on their experiences. They may suggest specific budget MIDI controllers that stood out for their reliability, features, or value for money. These recommendations can save you time and effort in your search.
Lessons Learned:
Optimal Configuration: Users can share their configurations, settings, and mapping strategies for their MIDI controllers. These insights can be particularly helpful if you have the same model and want to make the most of its capabilities.
Workflow Enhancements: User experiences often include details about how a MIDI controller improved their music production workflow. They may discuss the benefits of tactile control over parameters or the speed and efficiency gained through hands-on manipulation.
Creative Possibilities: Users can describe the creative possibilities that opened up with their MIDI controllers. They might share how they used pads for drum programming, knobs for expressive filter sweeps, or faders for precise automation.
User Community Support:
Forums and Online Communities: Many musicians and producers actively participate in online forums, social media groups, and dedicated user communities. These platforms provide spaces for sharing experiences, asking questions, and seeking assistance with MIDI controller-related issues.
Learning from User Communities: Engaging with these communities can be a valuable resource for gathering insights, troubleshooting problems, and discovering new techniques for using your budget MIDI controller effectively.
How to Access User Insights:
User Reviews: Online retailers, music gear websites, and forums often feature user reviews of budget MIDI controllers. Reading these reviews can provide an overall sense of user satisfaction and key features or issues to watch out for.
YouTube and Video Reviews: Video reviews on platforms like YouTube often showcase the practical use of budget MIDI controllers. These visual demonstrations can help you see the controller in action and understand its performance in a real studio environment.
Online Communities: Joining forums, social media groups, or online communities dedicated to music production and MIDI controllers can connect you with experienced users who are willing to share their insights, answer questions, and offer support.
Musical Peers: If you have musician or producer friends or colleagues, don’t hesitate to reach out and inquire about their experiences with budget MIDI controllers. Personal recommendations and experiences from trusted sources can be particularly valuable.
Incorporating user insights and experiences into your decision-making process and workflow can help you maximize the potential of your budget MIDI controller. By learning from those who have walked a similar path, you can make more informed choices, troubleshoot effectively, and explore creative possibilities that align with your musical aspirations.
Common Mistakes to Avoid
Choosing a budget MIDI controller can be overwhelming, and there are common mistakes that can be easily avoided. We’ll highlight pitfalls to watch out for, ensuring that you make an informed decision while shopping for your ideal MIDI controller.
Avoiding common mistakes when choosing a budget MIDI controller is essential to ensure that your investment aligns with your music production needs and doesn’t lead to unnecessary frustrations. Here’s an in-depth look at these common pitfalls and guidance on how to avoid them:
Neglecting Compatibility:
Mistake: Failing to check whether the MIDI controller is compatible with your digital audio workstation (DAW) can lead to integration issues and limited functionality.
Solution: Always verify that the MIDI controller you’re considering is compatible with your specific DAW. Many manufacturers provide lists of compatible DAWs, and it’s essential to cross-reference these lists before making a purchase.
Ignoring Build Quality:
Mistake: Overlooking the build quality of a MIDI controller can result in a device that doesn’t withstand regular use and doesn’t meet your expectations in terms of durability and longevity.
Solution: Prioritize controllers from reputable manufacturers known for their build quality. Read user reviews to gain insights into the device’s sturdiness and overall construction. Don’t sacrifice quality for a lower price.
Disregarding Key Count and Type:
Mistake: Selecting a MIDI controller with the wrong key count or type can limit your musical expression. If you’re a pianist, for example, a controller with too few keys or an incompatible key type may hinder your playing.
Solution: Consider your specific musical needs. If you need a wide range of keys for complex compositions, opt for a controller with more keys. For pianists, weighted keys might be preferable for a realistic feel. Ensure the MIDI controller aligns with your playing style and preferences.
Overlooking Control Surfaces and Pads:
Mistake: Neglecting the availability and quality of pads, knobs, and faders can limit your control over various parameters in your DAW and hinder your music production workflow.
Solution: Assess the MIDI controller’s control surfaces. Determine whether it provides sufficient pads and controls for your intended use, whether it’s for drum programming, effects manipulation, or other functions. Consider how these controls can streamline your workflow.
Skipping Extra Features:
Mistake: Overlooking additional features, such as aftertouch, LED displays, and customization options, can mean missing out on valuable creative tools and efficient ways to interact with your MIDI controller.
Solution: Explore the full range of features offered by a MIDI controller. Aftertouch, for instance, can add expressive nuances to your playing, while LED displays may provide visual feedback. Customization options can enhance your workflow. Assess how these features align with your music production needs.
Not Checking Software and DAW Support:
Mistake: Failing to verify whether the MIDI controller comes with dedicated software, DAW templates, or is compatible with specific plugins can lead to inefficiencies in your music production setup.
Solution: Investigate the software and DAW support offered with the controller. Some MIDI controllers include software bundles or templates that can enhance your production capabilities. If you use specific plugins or virtual instruments, ensure the controller is compatible with them.
Forgetting Portability and Size:
Mistake: Disregarding the portability and size of a MIDI controller can affect its practicality, especially if you plan to use it for live performances or have limited space in your studio.
Solution: Consider your mobility needs and the available space in your studio. Compact and lightweight controllers are easier to transport, while larger controllers with more keys and controls are suitable for fixed studio setups. Choose a size that suits your intended usage.
Neglecting User Insights:
Mistake: Overlooking user reviews and experiences can result in uninformed decisions. User feedback can provide valuable insights into how a MIDI controller performs in real-world scenarios.
Solution: Prioritize user reviews and experiences when researching MIDI controllers. Read what other musicians and producers have to say about their experiences with the device you’re considering. Their insights can help you make a well-informed choice.
Rushing the Decision:
Mistake: Hasty decisions based solely on price or immediate needs can lead to suboptimal choices. Impulsive purchases may not align with your long-term music production goals.
Solution: Take your time to research and consider your options. Understand your specific requirements and how a MIDI controller fits into your music production setup. Don’t rush the decision-making process; it’s a crucial step in enhancing your creative workflow.
By avoiding these common mistakes when choosing a budget MIDI controller, you can make an informed and satisfying investment in your music production equipment. Careful consideration of compatibility, build quality, key count, control surfaces, extra features, and user insights will help you select the right MIDI controller that complements your musical aspirations and creative needs.
Our, 5 Best Budget Home Studio MIDI Controllers

In our opinion here are five of the best mid-range home studio MIDI controllers which have a great range of features, have excellent build quality and are compatible with all of the popular DAW software on the market.
Novation Launchkey 49 MK3:
- 49 velocity-sensitive keys.
- 16 RGB backlit pads.
- InControl mode for seamless DAW control.
- Extensive integration with Ableton Live and other major DAWs.
M-Audio Keystation 61 MK3:
- 61 full-sized velocity-sensitive keys.
- Transport and directional buttons for DAW control.
- USB-powered and highly portable.
- Compatible with various music software.
Arturia KeyLab Essential 49:
- 49-key MIDI controller.
- 8 RGB backlit performance pads.
- 9 rotary encoders for control.
- Bundled with Arturia’s Analog Lab software.
Nektar Impact GX61:
- 61 velocity-sensitive keys.
- Dedicated transport controls.
- Integration with various DAWs.
- Affordable and user-friendly.
Native Instruments Komplete Kontrol S61 MK2:
- 61 semi-weighted keys with aftertouch.
- Intuitive color touch screen for easy navigation.
- Comprehensive integration with Native Instruments software.
- Smart Play features for creative musical exploration.
- High-quality build and excellent DAW compatibility.
Please note that product availability may vary, so be sure to check the latest prices and reviews from different suppliers when making your purchase. These MIDI controllers offer a balance between features, quality, and affordability, making them suitable for many home studio setups.
Conclusion
In the final section, we’ll look at MIDI terminology in some depth and also give you some educational resources to further expand your knowledge on this expansive and in-depth topic.
Appendix
To further support your journey into the world of budget home studio MIDI controllers, we’ve included an appendix. It contains a glossary of MIDI terminology to help you understand technical terms, as well as a list of additional resources for further learning and support.
Essential MIDI (Musical Instrument Digital Interface) terminology, providing definitions and explanations for key terms and concepts related to MIDI technology:
MIDI (Musical Instrument Digital Interface):
Definition: MIDI is a protocol that allows electronic musical instruments, computers, and other devices to communicate and exchange musical information. It primarily consists of messages that convey musical data, such as note events, control changes, and system messages.
CC (Control Change):
Definition: Control Change messages are MIDI messages that allow you to control parameters like volume, modulation, and pitch bend. These messages use controller numbers (0-127) to specify the parameter being adjusted.
Velocity:
Definition: Velocity refers to the speed or force with which a key or pad is struck on a MIDI controller. It’s often used to control the loudness or intensity of a note, simulating the dynamics of a real instrument.
Aftertouch (Channel and Polyphonic):
Definition: Aftertouch is a MIDI message that can be generated after a key is pressed on a controller. Channel aftertouch affects all notes played on a channel, while polyphonic aftertouch is specific to individual notes. It’s used for adding expressiveness and modulation to notes.
Pitch Bend:
Definition: Pitch Bend messages enable a controller to change the pitch of a note, simulating techniques like string bending on a guitar or pitch variation on a synthesizer. Pitch bend messages are sent as a value from -8192 to +8191, with 0 representing the neutral position.
Program Change:
Definition: A Program Change message is used to select different instrument or sound presets on a MIDI instrument or synthesizer. Each program has a unique program number associated with it.
SysEx (System Exclusive):
Definition: SysEx messages are used for manufacturer-specific or custom communication between MIDI devices. They allow for in-depth control and configuration of devices and are often used for firmware updates.
MIDI Channel:
Definition: MIDI channels are numbered from 1 to 16, and they are used to separate and address different instruments or parts within a MIDI setup. Each channel can be assigned a unique set of MIDI messages.
MIDI Interface:
Definition: A MIDI interface is a hardware device that facilitates the connection between MIDI devices and a computer or other MIDI equipment. It typically provides MIDI In and Out ports for data transfer.
DAW (Digital Audio Workstation):
Definition: A DAW is a software application used for recording, editing, and producing music. Many DAWs offer comprehensive MIDI capabilities, allowing you to compose, edit, and arrange MIDI sequences.
Sequencer:
Definition: A sequencer is a device or software feature that records and plays back MIDI data in a structured manner. It can be used to create intricate MIDI arrangements and compositions.
MIDI Clock:
Definition: MIDI Clock is a timing signal sent via MIDI that synchronizes the tempo of multiple MIDI devices. It ensures that MIDI equipment plays in time with each other.
MIDI Thru:
Definition: A MIDI Thru port on a device duplicates incoming MIDI data and passes it to another MIDI device. This is useful for daisy-chaining multiple MIDI instruments.
NRPN (Non-Registered Parameter Number):
Definition: NRPN messages are used to control a wide range of parameters on synthesizers and controllers. They offer extended control beyond standard CC messages.
RPN (Registered Parameter Number):
Definition: RPN messages provide a standardized way to control specific parameters on MIDI devices. They are typically pre-defined and universally recognized.
Latency:
Definition: Latency in MIDI refers to the delay between the moment you trigger a MIDI event and when you hear the result. Low latency is crucial for real-time performance and recording.
USB MIDI:
Definition: USB MIDI is a method of connecting MIDI controllers and devices to a computer using USB cables. It allows for faster data transfer and is now a common standard for many MIDI devices.
This glossary provides an overview of key MIDI terms, helping you understand the fundamental concepts and messages that underlie MIDI technology. It’s a valuable reference for anyone delving into the world of MIDI controllers and digital music production.
Extra Educational Resources:
If you’re interested in delving into MIDI technology and expanding your knowledge, there are several books and educational resources available. These resources cover various aspects of MIDI, from its fundamentals to advanced techniques.
Here are some recommended books and materials:
“MIDI For Musicians” by Craig Anderton:
This comprehensive book provides a detailed exploration of MIDI technology, including practical tips and techniques for musicians. It covers MIDI basics, sequencing, sound modules, and more. It’s an excellent resource for beginners and intermediate users.
“MIDI Power!” by Robert Guérin:
“MIDI Power!” offers in-depth insights into MIDI and its applications. It covers MIDI setup, routing, and advanced MIDI techniques. This book is well-suited for musicians and producers looking to harness the full potential of MIDI.
“MIDI: A Comprehensive Introduction” by Francis Rumsey and Mark Ballora:
This book provides a comprehensive introduction to MIDI technology and its applications in music and sound production. It covers MIDI basics, data encoding, and the use of MIDI in music synthesis and recording.
“MIDI For The Professional” by Paul D. Lehrman and Tim Tully:
“MIDI For The Professional” is designed for those seeking a deeper understanding of MIDI. It covers advanced MIDI concepts, troubleshooting, and MIDI in professional music production environments.
ONLINE COURSES AND TUTORIALS:
Platforms like Udemy, Coursera, and Skillshare offer a variety of online courses related to MIDI technology and music production. You can find courses for beginners and advanced users, covering topics such as MIDI sequencing, DAW integration, and sound design.
MIDI.org: The official website of MIDI Manufacturers Association (MMA) and the Association of Music Electronics Industry (AMEI) offers a wealth of educational resources, including articles, tutorials, and guides on MIDI technology.
ONLINE FORUMS AND COMMUNITIES:
Joining online forums and specialized MIDI communities can provide practical insights and answers to specific questions. These platforms often have discussions, tutorials, and resources shared by experienced users.
When selecting educational materials, consider your current knowledge level and specific interests. Whether you’re a beginner looking for a foundational understanding of MIDI or an advanced user seeking to master MIDI techniques, there are resources available to suit your needs.
Now, you can embark on your journey to find the best budget home studio MIDI controller that suits your musical aspirations and budget constraints. Why not also visit our latest article on the home digital recording studio essentials today.